Wednesday 25 August 2010

Inspired by Linda B

I've had this flower doll head half finished for months and today I finally did something with it and made this corrugated cardboard plaque.
The idea for this came from a great art blog, listed in my faves...Eclectic Visions of an Altered Journey.
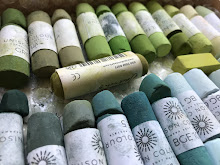
This lady has made some seriously fabulous art dolls so, as soon as I got my polymer clay and face mold, I was itching to have a try myself.


It's my first attempt so a bit basic but I'm looking forward to playing some more with these clay faces.
I have plenty already made and have a few plans for those others when I get the time.....maybe for Christmas????


Here it is in more detail. The flowers were stamped onto Grungepaper which had been coloured with Distress Inks.
The big flower and the flower stamped onto text are both from a set by Elusive ImagesStamps while the tiny flowers used stamps by Crafty Individuals and Hero Arts.
The flower stitch stamp is from a polmer set called 'Messy Stitches' by Katy Pertiet at Autumn Leaves.

Thursday 19 August 2010

Sea Shells

This is the best free stamp to come out of Craft Stamper yet, in my opinion...love it!
So here it is on two quick cards I made for Stamp Club tonight, using the new and delicious Eco Friendly acrylic paints.
I was actually trying that crackle effect with PVA glue on the back ground of the image. Didn't really succeed but hey, I liked the weathered effects I got anyway and the way the layers of different colours come through in a subtle way. I sanded the edges to give an even more worn, beachy look.

So, here's some detail, showing the paint background which bubbled instead of cracking so I just sanded the bubbles and got this cool aged look which I really like...

I used Tim Holtz's Sizzix Die for the lower edge - 'On The Edge, Scallops' - which I really like a lot.
Here I die cut it into an old strip of offcut metal from a previous project which had been inked and embossed with various E.P.s.
On the other card, the cracking worked a teeny bit. I stamped the image using Brilliance Pearlescent Chocolate which took beautifully on these paints.
I wanted an aged look to the brad but only had a bright and shiny gold one so I sanded the head of it with ordinary sandpaper, applied a little Bronze Eco Acrylic with my finger then added some green and rust coloured Versamagic ink. Et voila!

Saturday 14 August 2010

A simple birthday card

I recently bought two lots of Paper Artsy flower dies and was eager to give them a try so made this simple card, using Basic Grey patterned paper plus some vellum printed with a Glenda Waterworth design and a vellum piece Cuttlebugged with Swiss Dots.

Here's a detail of the flower and leaves.

 I outlined them using a permanent black pen and my lovely, invaluable Inkssentials White Pen. The middle medallion is frosted with Ranger Tim Holtz Distress Stickles in Clear Rock Candy ..... I love this stuff and think it's going to get quite a bit of use in my Christmas cards this year.
Talking of which, gosh,  must start thinking about those.................

Post-It Note House - All Credit to Isa

I've had two of these houses ready to alter for months now -actually probably getting on for a year, if I'm honest!
I bought them in Sainsbury's but got the idea when seeing one that Isa Norris had altered. You can see hers here
and I think you'll see why I was so inspired!!
This is how the Post-It Note house is when you buy it (sadly, I haven't seen them for sale for ages but they may come back one day)....


So, now I've shown you Isa's, I'm not so sure I should show you mine - lol ! but here it is in stages.
First of all, of course, I ripped off all the post-it notes from the roof and took out the little stack of paper from inside. I gessoed it all over and added some torn pieces of text from a book. I have already painted the inside of the 'roof' and the narrow base with some Eco Friendly acrylic paint...


Then I basically went a bit barmy with stamped bits of tissue paper, paint and foil. I think I overdid it a bit, in my opinion, but hey! Sometimes don't know when to stop....lol !! The plan was to make the roof in one piece of metal but I didn't have the size I needed so had to improvise a bit. It's embossed using a Cuttlebug embossing folder plus Ten Seconds Studio tools for the top bit of the roof and coloured with alcohol inks.

So here's the finished item. Stamps by Inkadinkado, Paper Artsy, Crafty Individuals, Elusive Images and Kelly Panacci plus the almost obligatory unknown U.M. !!......


Monday 9 August 2010

Slide Mailer Swap

I joined in a swap on Time For Crafting forum not so long ago in which we altered slide mailers.
We had the swap judged by Jean Hardy and Malcolm Noble of Crafty Individuals and a winner was chosen....what luck for me that I was given that very slide mailer as my swap.
This is the winning mailer and it was made by a lady called Vera. It has pride of place in my Dining Room as it goes so well with my colour scheme in there; a beautiful piece of artwork....thank you so much, Vera!! XX


I really enjoyed decorating a slide mailer again - haven't done one for ages. I only had a single one in my stash and this is what I did with it, using stamps from Crafty Individuals, Stampers Anonymous, Acey Deucy and Stamp It plus a big latin text U.M. stamp which I bought second-hand so don't know the maker.

So, this is the one I made - I went a bit mad with my acrylic paints, only having some rather gharish colours at the time but I actually like the effect!
The inside was stamped using Versamagic inks.


I now have some scrumptious Eco Friendly acrylics by Eco Green Crafts in fabulous muted shades. Watch this space as I'm now playing with those and hope to have some finished results soon....

Corrugated Cardboard and Metal

I played with this card to try out some ideas Linda Brown demonstrated with corrugated cardboard and acrylic paints. She also used InkaGold paste but I don't have any of that so just used paints.
I really love the look of the cardboard and it also gives a bit of dimension to a card without being a heavy weight on the front.
The tiny bird stamp I think is adorable and currently one of my favourite stamps. It was a freebie from the Crafty Individuals stand at the Craft Barn Extravaganza.

Here is a detail from the card....

July has come and gone!

....but here I am again at last. I haven't really had the chance to do much crafting the last few months but I do have a few things to show you which I made since the last posting in June.

First of all, in May, I went, with some friends from Time For Crafting forum, to the Craft Barn Extravanganza in Lingfield, Surrey. We had a great weekend and it was wonderful to see everyone again and also meet some new people too.
After the event, Sara - our illustrious 'leader' - organised that we should make a circular book, making a page each, to send to the Barn as thanks for such a brilliant weekend of demos and workshops.

This is the page I made, using an Acey Deucy stamp called 'Luciana' for the main image and making the background using Distress Inks and the new Matt White colour spray by Crafty Notions .....after seeing this on a sample on Linda Brown's (from L.B. Crafts) demo table.