Wednesday 27 April 2011

Big change - little car!

Back in October, getting away from artsy stuff for a minute, we had quite a big change in our household. We've always shared my husband's car but John decided the time had come for me to have my own to dent! He was getting fed up with my putting dents in his - this is not a joke...... we have a tiny garage and quite a big car and yes, I admit, I did scrape the wheel arches a few times.
So, anyway, I looked at a few little towny cars but from the start my heart was really set on the Fiat 500.

We'd only been looking a few weeks when we got one - 3 years old and slightly more sooped up than I expected to get, being a 1.4 engine instead of a 1.2.
'Fabio' I call him - the car, not my husband - and here he is with me on the South Downs on one of our first outings together. Cute, eh????..............and it fits in the garage a treat!

Monday 18 April 2011

Well, you WOOD have, wouldn't you?......

 ....I mean, if you'd seen this in a gift shop, would you have been able to walk out without buying it to alter???
Exactly!
Can't wait to overpaint that gharish green and make this into something real pretty.
The tree stands quite tall, at about 13 inches and I bought it in the Gift Store at Litlington Tea Gardens, Sussex on a lovely afternoon out yesterday with a friend of mine.


Friday 15 April 2011

Cardmaking Paradise

Yes, that's somewhere we've all been! But it's also a lovely, friendly community of crafters I am very proud to belong to.
It began with many of us meeting up on a few different online craft forums over the years then one of us, Sara Sandberg, took the mighty step of starting her own craft forum.
Recently the name changed to Cardmaking Paradise, along with Sara's online crafting magazine which is growing into something rather fab. Here you get product reviews, templates for cards, projects etc and it's just a great resource to have at your fingertips.
Sara asked me to become a Design Team Member a while ago - I said yes but then didn't do anything for her for ages! Finally,though, I have started to make a few things to be shown in the magazine and here are my efforts to date......

This wooden peg is a 'giant' one, available from the Craft Barn. You can dismantle it for decorating though I was a bit like a chimpanzee trying to do an intelligence test when I came to put it back together again - LOL!
I got there in the end.
I painted the peg with Eco Green Acrylic Paints. The bottom edge there is made using copper metal embossed with swirly Cuttlebug E.F. and die cut using Tim's Scallops On The Edge Die. The Swallow is a Sizzlets Die and the sentiment stamp is by Stamping Sensations.
Inside the peg, I stamped a music background - it's unmounted and I can't remember who made it now; I've had it ages...you know how it is!


It was a gloomy dark day - you know the kind we had a lot over this long, long Winter - when I took these photos so apologies for the dark quality of them.


On what I consider the back of the piece, I stamped Stampendous Wavy Music, adding the dots left over from Tim's scallop die to highlight some of the notes.

I painted freehand stripes of gold and copper acrylic paint on the sides and grunged up the metal clip with some alcohol inks.


The best fun was playing with the Tim Holtz die which I painted with dark brown acrylic paint into which I sprinkled some Embossing Powders and heated till they bubbled. I love this effect and have Lin Brown to thank for that technique.


The next project was to make and decorate a card case for the magazine.
And here it is - I won't waffle on about this one. To get the template and many other fab templates, visit Cardmaking Paradise and subscribe to this great magazine!
You may or may not recognise the Japanese calligraphy stamp on the spine as part of the freebie stamp from October 2009.
Bird stamp (and most of the other stamps I used) from The Orient set by Simple Expressions - now sadly no longer in existence.


I should add that these photos are NOT the ones Sara took for the mag. I take full responsibility. Was in a bit of a rush, hence the badly set up background!!! Click on any photo to enlarge.


Then came Mother's Day. Even though I'm quite old I'm very fortunate to still have my mother, whom I love dearly. I made this card for her from a shape we made at our local Stamp Club - a Side Step Card.
I was feeling bold and OTT when I made this ....you may be able to tell ! LOL

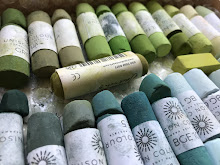
 Yes, it was another dark and dismal day when I took these photos! Flower stamps by Hero Arts and Penny Black.  The big ones are coloured with Staedtler Chalk Pencils.

I didn't have a Leaf stamp in the right style so I just drew one.


Thanks for coming over and I'll have more in a few days since I have just been on a brilliant workshop with the brilliant Jo Capper Sandon. I'll post the resulting book covers very soon. Watch this space..........

Thursday 14 April 2011

And now getting right up to date.....almost!

January and February was a bit of a crafting wilderness for me but I've got back into the swing of things now.
So, to bring this right up to date, here are the things I've been making that have stopped me having time to update my blog....LOL!

Some birthday cards for crafting friends......


This was to try out the 'Alcohol Ink Capture' technique shown in the March issue of Craft Stamper by Anneliese Bates. It worked really well with this great little stamp by Penny Black, called 'Clique'. Gosh, I use this stamp SO much!


It's worth showing you a close-up of the glass panel because the effect is so fabulous. Only thing was, I wished I hadn't had to stick the glass to the white panel with Diamond Glaze as this lost the gorgeously glossy effect of the clear embossing powder on the alcohol ink. If I could have found a way of suspending it above the card, I would have done that.


I haven't used Photo Real stamps much lately so decided to get this brilliant Marilyn Monroe image out for this next birthday card, also using some starry handmade paper,  a pretty little frame stamp by....oh God, I can't remember...and a fab big crystal brad
from a set by Papermania.


Now this one was something rather out of my comfort zone. I found these great 50's retro stamps by Artemio and the same day saw some crockery in a furnishing store with a design on it taken from a Sanderson 1950s design called 'Dandelion Flower'.
So, here I have tried to recreate this using masking.

I wanted a suitably 1950s sentiment so nabbed me a great font online - free download too! - and computer-generated it.


Full credit goes to Joanne Wardle for this next one....this is a direct copy of her idea. Only the stamps differ!
I love the clean simplicity of this idea and the colouring in with coloured pencils is very therapeutic. I only had a cheap set of kiddies pencils at the time so used those.
I added some Enamel Accents for a bit of dimension and because I had just bought them and wanted to try them out.
Stamps: Flowers by Penny Black
             Sentiment by Hero Arts


Now, since then I have been and gone and bought two sets of rather nice coloured pencils - I'm going through a phase!
Both by Derwent and they seem like they are going to be rather good to use.
I have the 24 pencil sets of both Inktense and Coloursoft.
I've so far only used the Inktense and not played much but here are a couple of close-ups of what you can do with them when water is added to make them like watercolour. The colours suddenly pop when you add the water and become really vivid.....it's like magic!!!
Well, I haven't quite caught up yet but I need to get up and move about a bit now. I'll get right up to date tomorrow if I can. Thanks for popping by and looking! XXX

Catch Up!

Oh my gosh, don't know how I ever found time to do a day-job! Life has been busy, busy, busy. For a while I didn't have time to do any creating but, the last few months, I've got myself going again so thought I would put up some photos of some of the stuff I've made......


This is an ATC I made last October with the theme 'Swirls & Curls' for a group swap. I used some embossed metal, Terra dimensional paste and acrylic and Viva Precious Metal Colours. The text is a stamp by Paper Artsy as is the script background stamp.


Then, in December, it was my turn to host the ATC group swap. My theme was Angels - one of my favourite things!!!
Here are the ATC I made for that and the extra Christmas Angels I made for everyone who played that month.....


It's a rubbish scan of these but hey, it was nearly Christmas and lots to do! All the images were printed on my PC except the bottom one which is a photoreal woode-mounted stamp I got from EBay which has no maker's name on it.


I really adore this little 'Lyre Angel' stamp - made by Blade Rubber and she went nicely with this frame from a set by Invoke Arts which is also lovely, lovely, lovely!!!


I didn't get to make many Xmas cards and must start soon for this year or the same will happen again!
Here is one I made.....


Another stamp I have fallen in love with is this row of city buildings made by Crafty Individuals. The Santa and Sleigh is also by them.
I layered the buildings which looked quite cool....


Okay, that's Christmas done. So, now we get to January! I made two similar Thank You cards from a great fir cone stamp by Elusive Images which is crying out for frosty Glitter Glue treatment and got it in spades!


The background squares were made, of course, with the trusty Swiss Dots Cuttlebug embossing folder and the sentiment is fromj a clear set by Hero Arts.