Thursday, 24 December 2009

Ready Steady Stamp Banner 4


Oh my gosh...how come Christmas rushes up to meet us too fast each year!!???
I finally got my fourth banner done this morning for the Ready Steady Stamp challenge that's been running for the last few weeks but those of you who also did this challenge may notice that my banner number three never materialised!

I just had no time to make it or even to look at everyone else's and haven't seen everyone's fourth banners yet either. Phew! I WILL catch up after Christmas and maybe make that third banner in the New Year. Then I can finally assemble mine and it'll be all ready for next Christmas - lol!

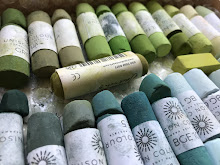
So, these were the ingredients, above, for our fourth banners and here is my attempt. I put a little gold bell at the bottom to go with my theme and the Jingle Bells script stamp is by Crafty Individuals. I used the same background stamp on this one as on my first banner and it's made by Paper Artsy from whom I also got the German Scrap stars.
Thanks for dropping by and sorry I couldn't quite complete the task. Still glad I did it though as, when I have time to finish it, I will have something to be proud of to decorate my living room next year.

Thursday, 26 November 2009

Second Banner for Ready Steady Stamp


We have a new recipe to follow for the banner over on the Ready Steady Stamp challenge this time but using the same colour scheme as on the first one.
Here is the recipe that we had to follow and this is my banner, using a PSX small snowflake stamp, a Magenta large snowflake and I used a Cuttlebug embossing folder for the Cut N' Dry stamping on the piece of pink cardstock.
I hope you can just abut see the brown paper strip which has been punched using a Fiskars border punch.

Wednesday, 25 November 2009

A couple of birthday cards


I made these last week for two of the ladies at Stamp Club who had birthdays this month. Shame I then forgot to take them with me on the night - duh!!
Anyway, I hope they have got them now in the post.

The first card began as just playing at making a background using the Versamark resist technique and developed into this card using a fairy collage stamp by Crafty Individuals plus Hero Arts words, a floral stamp by Penny Black and the dragonfly polymer stamp which was free with Craft Stamper not so long ago. The big flower is stamped onto text paper and comes from a full sheet by Elusive Images.
Somewhere along the way, I've lost the photo I took of this card but I have a couple of photos close up of some of the detail. I'm SURE I have that photo on this computer somewhere....lost in the wrong file, I daresay.

The second card was inspired by an article by Sue Abbott in the December issue of Craft Stamper and I used a printed image and blank white frame both by Crafty Individuals and a lovely flower background stamp also by CI plus a little leaf sprig stamp by Art Impressions and a crackle stamp by Stampers Anonymous. I've put in the link though it doesn't look like they make this cube any more, sadly.

Anyway, thanks for dropping by. More very soon....I'm on a roll, if I only have time to do the stuff I have lined up!

Myth & Legend


Last month it was my choice of theme for an ATC group I belong to and I chose 'Myth & Legend'.
Now we've all had our swaps sent out, here are the ones I came up with....

The stamp I used on the Gwenyvere ATC is by Art By Moonlight, the Heroides ATC features a stamp by Oxford Impressions from a full sheet called 'Soul of the Rose' as does the Mermaid stamp and the gorgeous 'Lavina Waits' stamp on the last ATC is made by Third Coast Stamps.

Sunday, 15 November 2009

Ready - Steady.....Stamp!


Well, at last! I've been carrying the banner for the Ready Steady Stamp challenge for ages now and finally I have the chance, by the skin of my teeth, to join in.
The current challenge is a brilliant idea....to make a Christmas banner or banners each week for four weeks and then string them all together to decorate our homes. Excellent!!
I also love that we could choose our colour scheme for this, to go with our decor.
My first one had to be a bit rushed between working this weekend but here it is and next week I hope I'll have time to make more than one.......

Monday, 9 November 2009

Nearly Christmas!!!!


...but I've only made 4 Christmas cards so far.
I've been having so much fun using some of Leandra's Squiggly Ink Christmas Stamps - some old and some new but all new to me this year. Also used her fabby Rum & Raisin double sided Xmas papers....love 'em, love 'em, love 'em!!!

The Happy Holidays card looks a bit 'pants' in this photo as the Mirri card sentiment has
really caught the flash from my camera badly.
It looks much better in real life....HONEST!

Click on each photo for more detail....thanks for dropping by!

Still playing catch-up!


I still have a bit more stuff to post from recent weeks to get back up to date here with my artsy stuff.
Now, where was I up to???
Ah yes, we made Inchie Cubes at Stamp Club - when was that? - way back in September!!
Oh my gosh, I'm well behind.
We used the template from Craft Stamper, August 2009, and oh my God, I only just saw in there that I have used the same stamps as one of the ladies in CS mag....copy cat, lol!!
Anyway, these are two I made. The copycat one using stamps by Crafty Individuals and the other one using Lynne Perrella Acey Deucy stamps (my absolute favourites!) now made by Stampington.

Click on the photo for more detail....

Tuesday, 27 October 2009

Back again!


Again, it's been ages since I managed to get my blog updated but here I am at last.
The summer has been busy and hectic with several visits to London and a couple of canal narrowboat breaks amongst other things.
Now things have settled down a bit and I've been able to get down to some artsy stuff again....high time too!
I made these ATCs in September for a group swap, the theme of which was 'Masks'. I didn't have any suitable stamps to use so got these images from the Net and played around with them, adding some stamping, Croco and a little bit of lace.
Click on each image for a closer look......

Friday, 24 July 2009

My 'Inchies' arrived today!


I've been in the process of doing an Inchie swap with my friend Stephany for what seems like about a decade now! lol !!! We kept extending the deadline for various reasons but that was okay 'cause it's only us two.
Anyway, we both mailed them on Monday and mine arrived from Steph today!! I think that's pretty incredible from the States.
So, here are my little beauties...aren't they lovely!!!
The only stipulation was to use some of the Ikadinkado Polymer Inchie Stamps which we both have.
She also sent me these other goodies pictured here - really pretty papers, the most beautiful magnetic bookmark, a whole PILE of acetate (not in the photo) and this floral notebook too....AND this pretty Thank You card. What a spoilt girl I am!!
I'll post photos of the ones I sent her when I'm sure that she's received them.
I haven't done any Inchies for ages so this was really fun to do ....thanks for another great swap, Steph!

Thursday, 23 July 2009

And here is the set I made.....


Well, my Inchies have arrived in the U.S. now so here is a photo of them and also of the box I decorated to send them in.
(Don't you just HATE it when the darn tissue doesn't go translucent when you adhere it to your surface.... that bugs me big-time!! Still there was no time to do anything about it so 'sorry Steph!')

I made mine from a Glimmer Mist background, (all except two which are made using Viva Decor Ferro paste) stamped on top with Versafine ink and also used Twinkling H20s, Adirondack Acrylic, Distress Embossing Powder and some Platinum Glitter Glue for accents.

Click on the photos to see more detail....thanks for looking!

Saturday, 27 June 2009

Art Doll


I've been itching to try one of these for ages. This is inspired by one I saw in an old issue of Take Ten by Stampington. I used stamps by Dawn Houser, Era Graphics, Elusive Images plus a big background wood-mounted stamp that bears no maker's name. I also used a fab metal crown that my friend Stephany once sent me a pack of.
And so, appropriately, I then made this doll into a birthday card for Steph using some of my favourite background papers by Basic Grey.
Click on the photos to enlarge.....

Thursday, 4 June 2009

96th Birthday!!!


I made this card using Ten Seconds Studio tools and mold, acrylic paint, Stickles Glitter Glue, a flat backed gem, E.P. and Glimmer Mists along with Bazzill chips and the 'Stipple' texture mat by Carolines - oh plus, I'm afraid,.......a PEEL-OFF !!
Sometimes it's the best way to put numbers on a card - that's my excuse anyway. lol

I had one of those "ooooooh" moments when I lifted the texture stamp off my triple-embossed ring of chipboard - love this effect!
Click on photos for more detail. Thanks for looking.

Friday, 22 May 2009

Shrink Plastic


So, at Stamp Club last night we did Shrink Plastic. I only ended up with this one piece cause I used Brilliance ink and it was taking forever to dry before I punched the holes. It never did dry actually, hence the smudge on the top layer!
But we all had fun, as usual, and this was the first time I tried using black shrink. Nice!!

May Stamp Club


So nice to be back at Stamp Club last night after missing a couple of months.
We've started doing cards for people's birthdays and there were three to make for May. Here are the ones I made, all using Lynne Perrella's fabulous stamps, now made by Stampington.
I bought Calligraphy Robe and Crimson Fan finally - after coveting them for years - when I visited Blade Rubber in London recently for the first time....woooo, what a great shop, stuck full of classy wood-mounted red rubber!

Saturday, 9 May 2009

I'm back!


Here I am again after a rather long break from doing anything creative. It's going to take me a while to get back inot the swing of things but here are a couple of quick cards I made yesterday - two quite different styles.

For the top card I used Lynne Perella's Botanica stamp, now made by Stampington and additional stamps by Kelly Panacci (for Sandylion), Hero Arts and Paper Artsy. The paper is from a mat stack by DCWV. I made the background to Botanica brayering dye inks over clear E.P. then spraying with Glimmer Mists on top.

The papers for the other card are from a collage pack by Paper Reflections (excluding the Audrey Hepburn image) and the word stamp is by Paper Artsy. Embellished with Diamante gems and silver glitter glue on her head-dress. The Star punch was bought in Tesco!
Click on the pictures to see more detail....

Tuesday, 24 March 2009

Sunday Stampers


I just found this blog challenge while surfing around people's blogs this evening. This one is new to me so "Hi - everyone from Sunday Stampers!"
Here's a card I made using a stamp by The Artful Lexicon and alphabet stamps by Paper Artsy. I made the film-strip using a paper punch. The 'diamonds' are from an old piece of costume jewellery.

Texture ATCs


These are the ATCs I made for a recent group swap, the theme of which was 'Texture'. What a great theme - leaving us lots freedom for our own interpretation.

Three of them are done using black UTEE - inspired by Glenda Waterworth and her black UTEE pieces on her 'Artylicious' blog.
I added various other EPs during the process plus some Pearlex and glitter in places and then rubbed in some Pearlex to highlight parts of the design.
The Circus Boy was done entirely in Grungeboard using Distress Inks and Copper and then there's a metal-embossed collage. This was done using Ten Seconds Studio tools and moulds and coloured using alcohol inks.

Click on each photo to get more detail......

Monday, 23 March 2009

Weekend in Rye


Back in February it was my 56th birthday - scary!!
My husband treated me to a couple of nights in a lovely hotel (The George) in Rye, East Sussex where we had a really cozy little room, fine food in their restaurant and a central position from which to wander round the delightful old town of Rye.

This was a much-needed break for me and for John who had just come home on leave and it really was the perfect tonic.
Above are some photos I took while walking round town - wish I knew how to put photos anywhere else but at the top of each post but haven't found a way yet!!
Don't you think that little dog is so cute? Lucky that sash window didn't fall down!